ROS Driver for Adafruit IMU Bosch BNO055
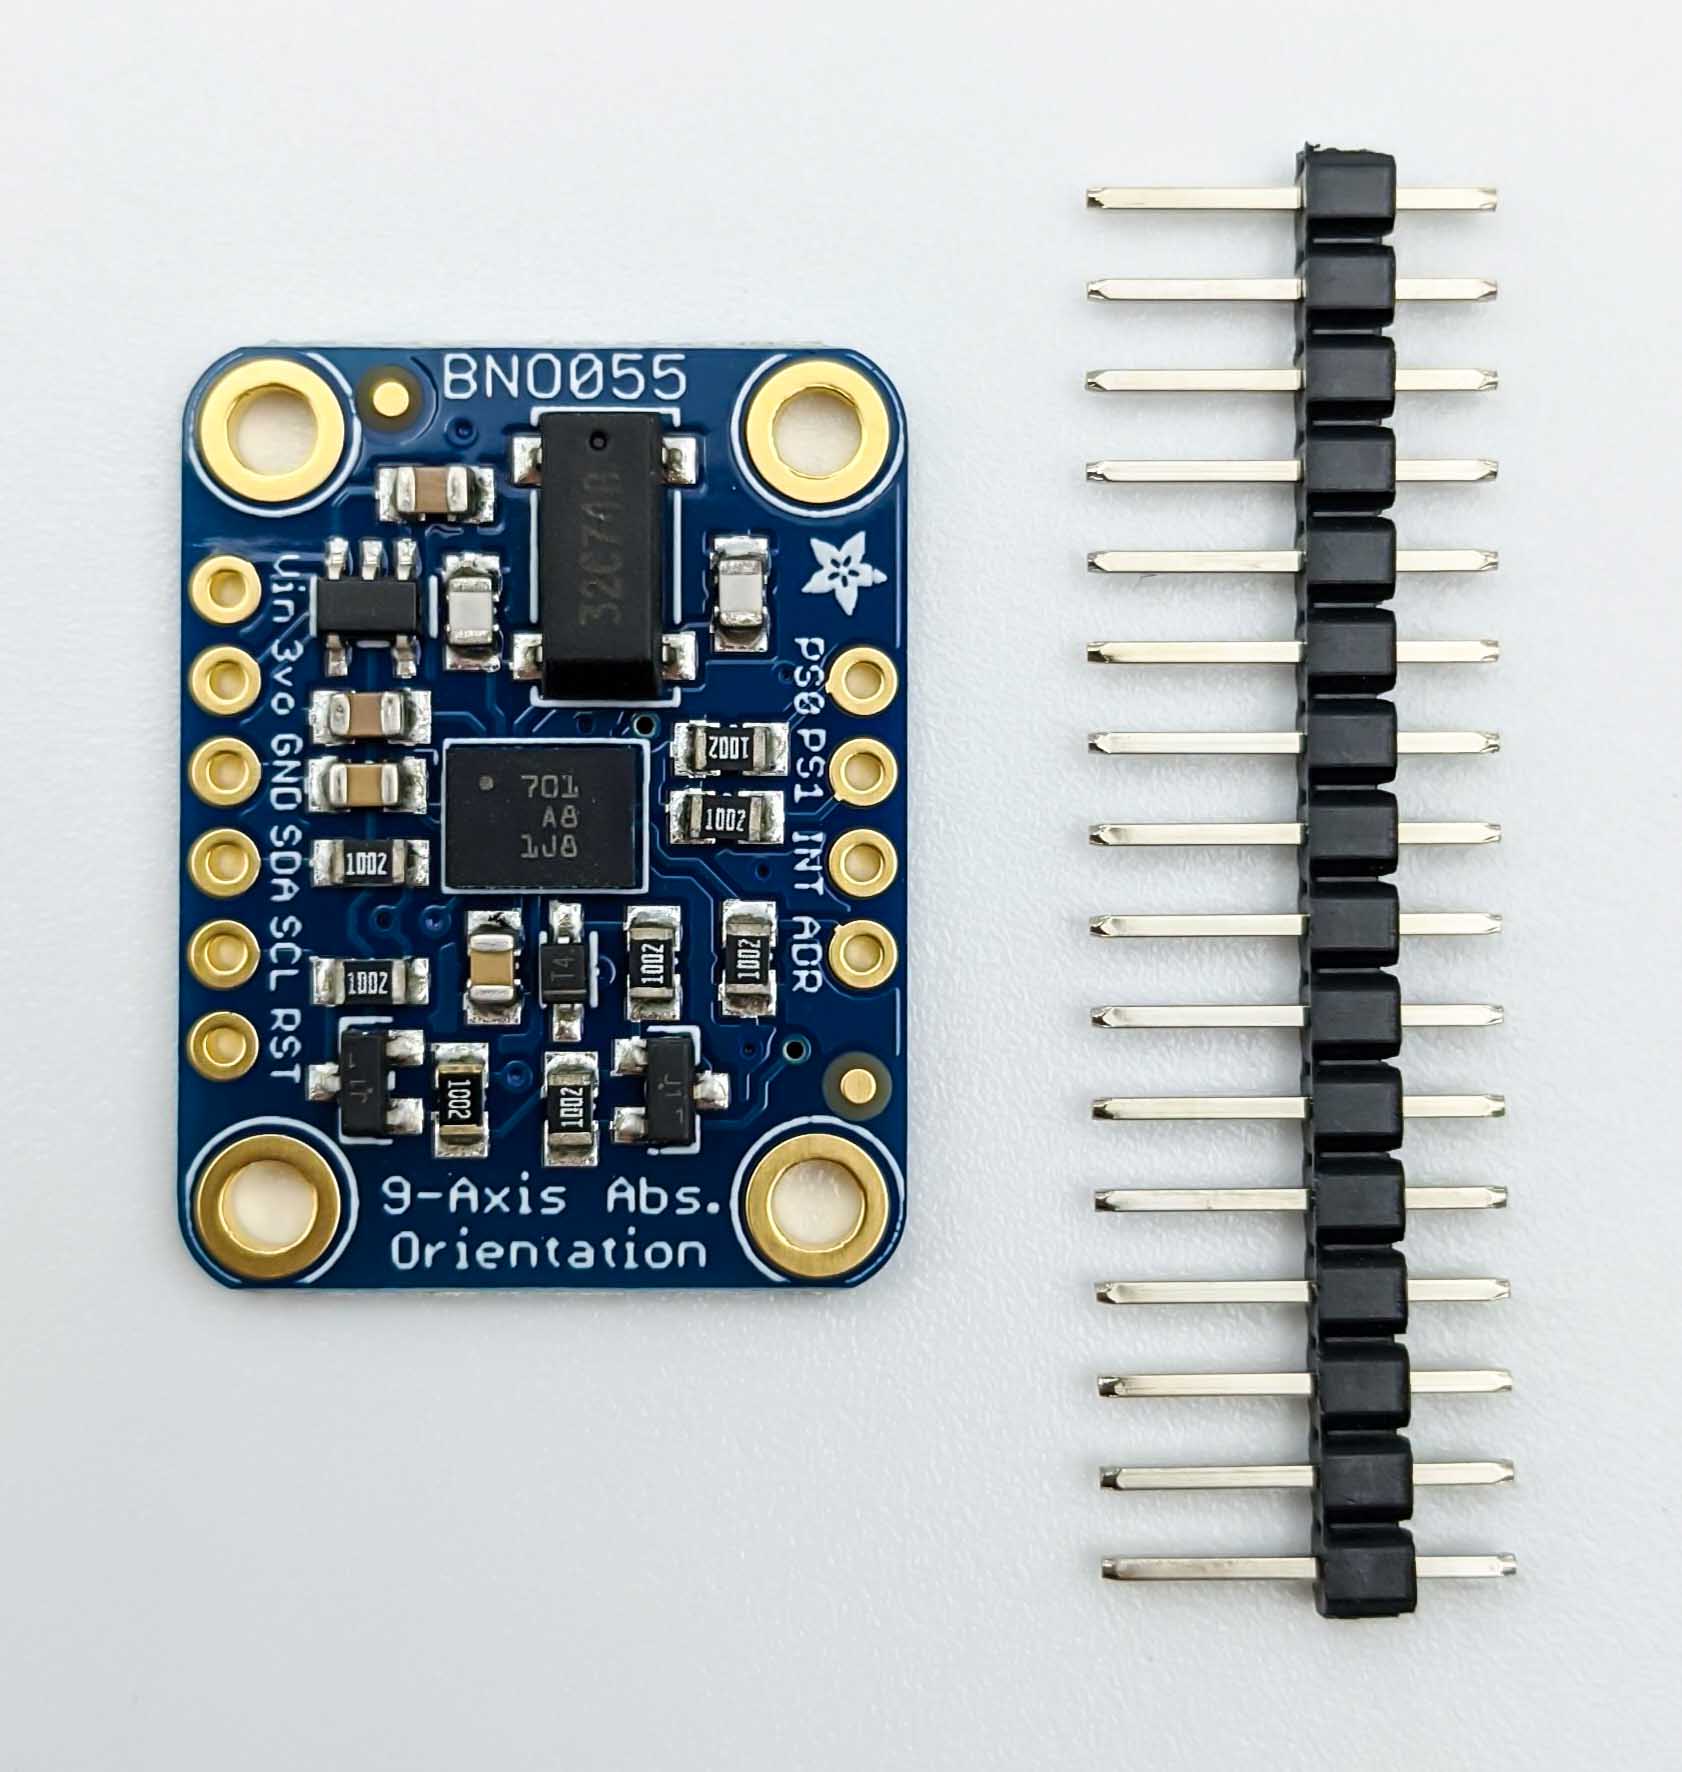
The Adafruit 9-DOF Absolute Orientation IMU Fusion Breakout - BNO055 is based on the BNO055 from Bosch. This is system in package solution which features a MEMS accelerometer, magnetometer and gyroscope and putting them on a single die with a high speed ARM Cortex-M0 based processor to digest all the sensor data, abstract the sensor fusion and real time requirements away, and spit out data you can use in quaternions, Euler angles or vectors.
High level Driver (I2C)
When connecting the IMU directly via i2c to the single board computer (SBC), which is refered to as the high level approach, we can make use of
ros-imu-bno055 ROS package.
Low Level Driver
In case we connect the Bosch IMU to the low level microcontroller board (e.g. Teensy or Arduino) there is Adafruit BNO055 library which can be used.
Pinout
The following sections are found at learn.adafruit.com/adafruit-bno055-absolute-orientation-sensor/pinouts. For the robot the power pins as well as the I2C pins are important.
Power Pins
- VIN: 3.3-5.0V power supply input
- 3VO: 3.3V output from the on-board linear voltage regulator, you can grab up to about 50mA as necessary
- GND: The common/GND pin for power and logic
I2C Pins
- SCL - I2C clock pin, connect to your microcontrollers I2C clock line. This pin can be used with 3V or 5V logic, and there's a 10K pullup on this pin.
- SDA - I2C data pin, connect to your microcontrollers I2C data line. This pin can be used with 3V or 5V logic, and there's a 10K pullup on this pin.
Other Pins
- RST: Hardware reset pin. Set this pin low then high to cause a reset on the sensor. This pin is 5V safe.
- INT: The HW interrupt output pin, which can be configured to generate an interrupt signal when certain events occur like movement detected by the accelerometer, etc. (not currently supported in the Adafruit library, but the chip and HW is capable of generating this signal). The voltage level out is 3V
- ADR: Set this pin high to change the default I2C address for the BNO055 if you need to connect two ICs on the same I2C bus. The default address is 0x28. If this pin is connected to 3V, the address will be 0x29
- PS0 and PS1: These pins can be used to change the mode of the device (it can also do HID-I2C and UART) and also are provided in case Bosch provides a firmware update at some point for the ARM Cortex M0 MCU inside the sensor. They should normally be left unconnected.
Wiring
You can easily wire this breakout to a microcontroller or single board computer (SBC). The following sections will show both options using Teensy as a microcontroller and Raspberry Pi 4 B as SBC. For another kind of microcontroller or SBC, just make sure it has I2C capability and port the code.
Single Board Computer
The following sections show how to wire and use the BNO055 with the Raspberry Pi 4 B SBC.
Wiring
To connect the assembled BNO055 breakout to a Raspberry Pi 4 B, follow the wiring diagram.
TODO Fritzing wiring diagram I2C to hub or one of the I2C pins (SCL and SDA) of the Raspberry Pi Power (Vin) to 3.3V or 5V of the Raspberry Pi GND to GND
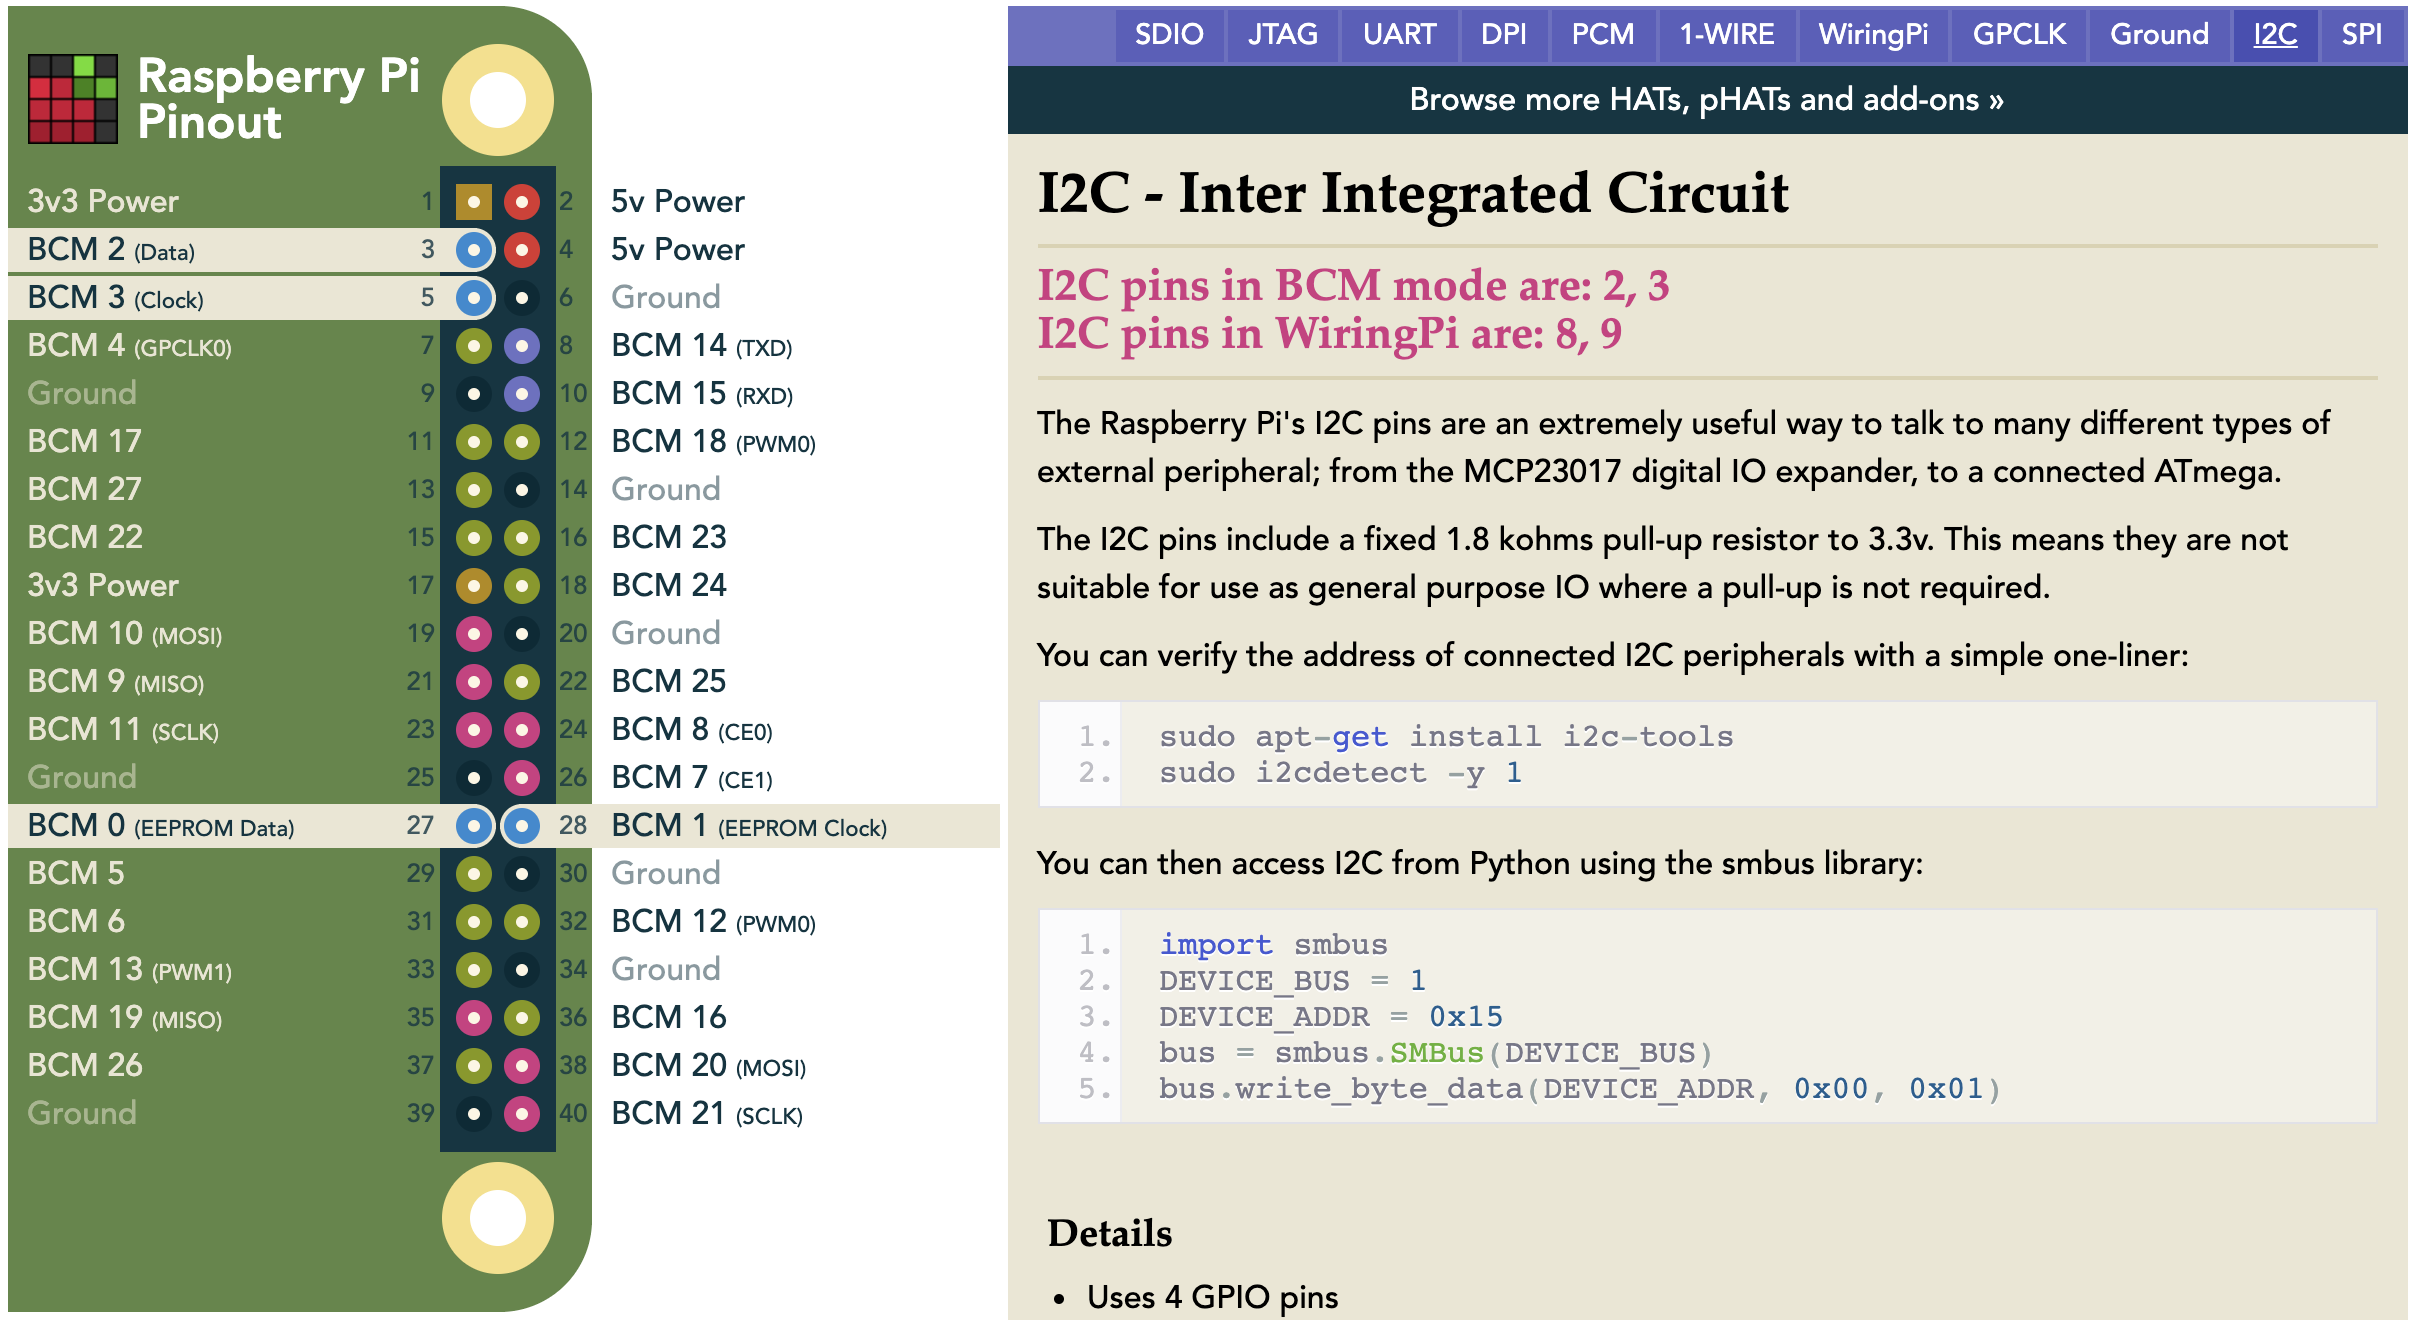
- Connect Vin (red wire) to the power supply, 3-5V is fine.
- Connect the SCL (yellow wire) pin to the I2C clock SCL pin on your SBC or an I2C hub that is connected to the SBC.
- Connect the SDA (blue wire) pin to the I2C data SDA pin on your SBC or an I2C hub that is connected to the SBC.
Software
Refer to https://learn.adafruit.com/adafruit-bno055-absolute-orientation-sensor/python-circuitpython as well as to the CircuitPython Guide
-
Make sure you have python3-venv installed:
1sudo apt install python3.8-venv -
Create a virtual environment:
1$ python3 -m venv venv -
Activate the venv
1
2
$ source venv/bin/activate (venv) fjp@remo:~/test_imu$ -
Install the CircuitPython driver for the BNO055:
1pip install adafruit-circuitpython-bno055 -
Create a simple test program or copy the example programs:
1$ vim imu.pyand copy the following content:
 1
 2
 3
 4
 5
 6
 7
 8
 9
10
11
12
13
14
15
16
import adafruit_bno055 # This driver takes an instantiated and active I2C object as an argument to its constructor. # The way to create an I2C object depends on the board you are using. # For boards with labeled SCL and SDA pins, you can: import board i2c = board.I2C() # Once you have the I2C object, you can create the sensor object: sensor = adafruit_bno055.BNO055_I2C(i2c) # And then you can start reading the measurements: print(sensor.temperature) print(sensor.euler) print(sensor.gravity) -
TODO i2c permissions to execute with non-admin user or use sudo
-
Execute the python script:
1python imu.pyThis should result in an output similar to:
1
2
3
4
(venv) root@remo:/home/fjp/test_imu# python imu.py
29
(8.0, 0.0, 0.0)
(0.0, 0.0, 0.0)
Microcontroller
The following sections show how to wire and use the BNO055 with the Teensy microcontroller board using the PlatformIO plugin of Visual Studio Code.
Info
Instructions to connect the BNO055 with an Arduino microcontroller are found at learn.adafruit.com/adafruit-bno055-absolute-orientation-sensor/arduino-code.
Wiring
To connect the assembled BNO055 breakout to a Raspberry Pi 4 B, follow the wiring diagram.
TODO Fritzing wiring diagram
- Connect Vin (red wire) to the power supply, 3-5V is fine. Use the same voltage that the microcontroller logic is based off of. For most Arduinos, that is 5V
- Connect GND (black wire) to common power/data ground
- Connect the SCL (yellow wire) pin to the I2C clock SCL pin on your microcontoller.
- Connect the SDA (blue wire) pin to the I2C data SDA pin on your microcontoller.
Software
The Adafruit_BNO055 driver supports reading raw sensor data, or you can use the Adafruit Unified Sensor system to retrieve orientation data in a standard data format.
In the Arduino library manager you can install both, the Adafruit_BNO055 driver and the Adafruit Unified Sensor.
TODO
Add PlatformIO instructions